If you ask me “which ESP32 should I buy to start?”, the short answer is ESP32-C3. It is modern, cheap, has Bluetooth 5 and native USB, and for 90 % of sensor and home-automation projects it is more than enough.
It is not perfect: it has few pins and is missing a few things. Let’s see exactly what you get and what you do not.
What it is
The C3 is the “next generation” ESP32: instead of the usual Xtensa cores, it uses RISC-V, the open architecture Espressif adopted for its newest chips.
| Thing | Value |
|---|---|
| Core | 1 × RISC-V @ 160 MHz |
| SRAM | 400 KB |
| Wi-Fi | 802.11 b/g/n (2.4 GHz) |
| Bluetooth | BLE 5 |
| GPIOs | 22 |
| ADC | 2 × 12-bit (6 channels) |
| DAC | none |
| Touch | none |
| USB | native Serial/JTAG |
The good
- Cheap: it usually costs the same as an ESP8266 and beats it at everything.
- BLE 5: great for talking to a phone (no classic Bluetooth).
- Native USB: forget the CH340 and enjoy built-in JTAG, which means breakpoint debugging with no extra hardware.
- Low power: in deep sleep it stays below the classic, ideal for battery-powered nodes.
- RISC-V: modern toolchain and first-class support in ESP-IDF, Arduino and Rust.
The bad
- Only 22 GPIOs, and you have to subtract the flash pins.
- No DAC and no touch: if you need real analog output or capacitive buttons, go back to the classic or the S2.
- Single core: you cannot split work across two CPUs.
- Bluetooth is BLE only, no classic.
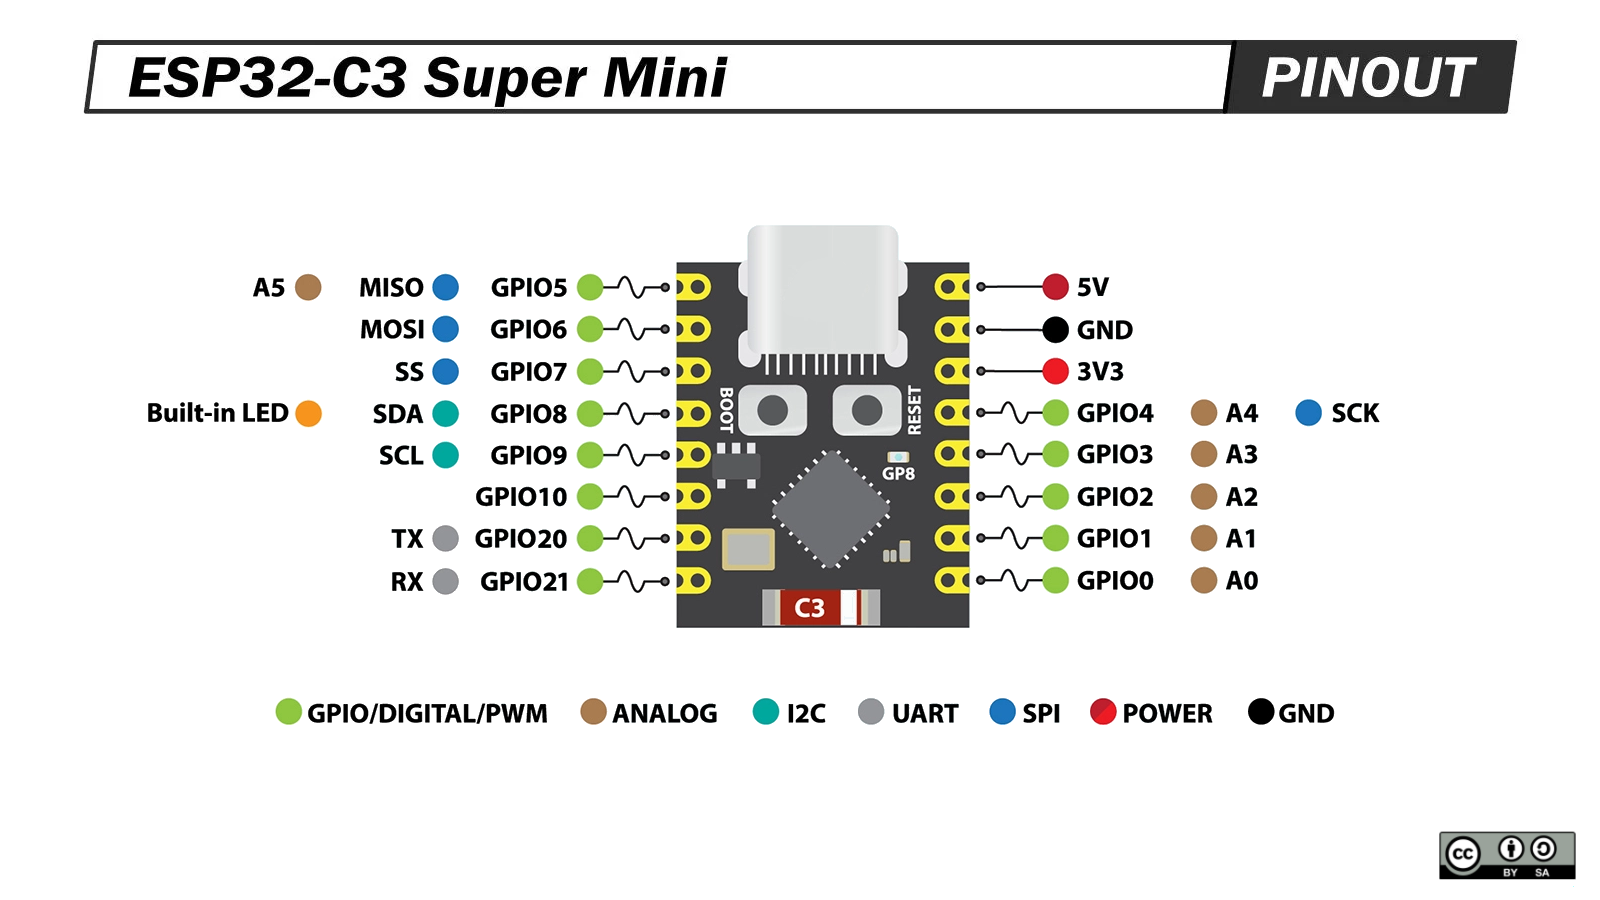
Pinout: the essentials
| Pin(s) | What for |
|---|---|
| GPIO18 / GPIO19 | USB D− / D+ (USB Serial/JTAG) |
| GPIO0–4 | ADC1 |
| GPIO5 | ADC2 |
| GPIO2, GPIO8, GPIO9 | Strapping (careful with 9: it is the BOOT button) |
| GPIO11–17 | Internal flash (do not use) |
| GPIO20 / GPIO21 | UART (RX / TX) |
As always: ADC2 does not work with Wi-Fi on, so for sensors use ADC1 (GPIO0–4).
Boards and modules
- ESP32-C3-WROOM-02 — the standard module.
- ESP32-C3-MINI-1 — small, for your own PCB.
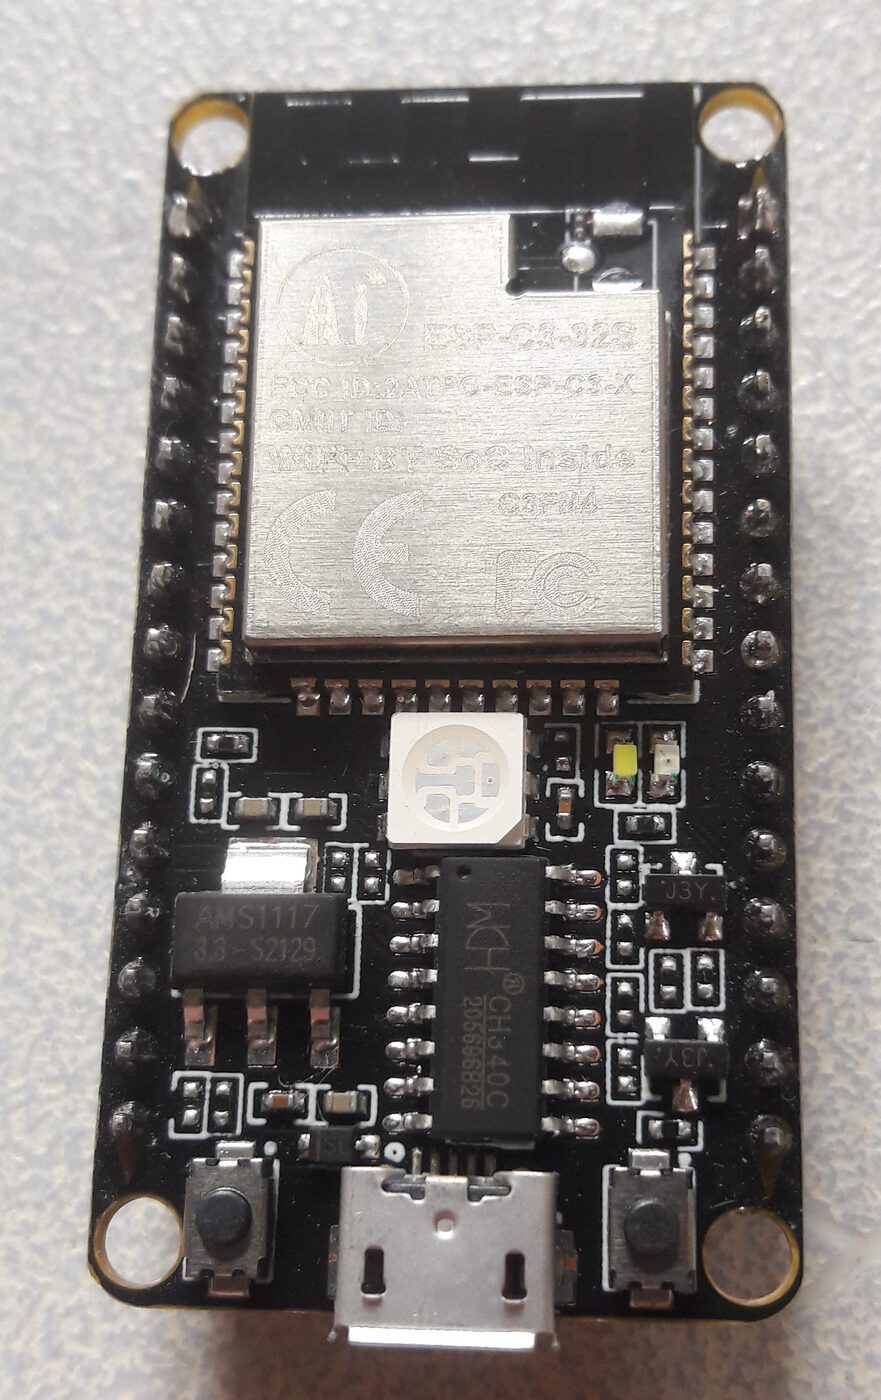
- ESP32-C3-DevKitM-1 — the small, stick-like board.
- ESP32-C3-DevKitC-02 — with more pins and buttons.
When to pick it (and when not to)
Yes, pick the C3 if…
- You are getting started and do not want to overspend.
- You are building home automation, sensors or relays with Wi-Fi and BLE.
- You want native USB and JTAG with no extra chip.
- You want a battery node with good deep sleep.
Do not pick it if…
- You need classic Bluetooth → classic ESP32.
- You need a DAC or touch → classic or S2.
- You need lots of GPIOs → S2 or S3.
- You need camera, audio or AI → S3.
- You need Matter/Thread/Zigbee → C6 or H2.
Typical mistakes
- Counting on 22 GPIOs and forgetting that GPIO11–17 are the flash.
- Putting the BOOT button on GPIO9 and having the chip boot into download mode.
- Looking for the DAC or touch in the C3 docs (they do not exist).
- Reading sensors on ADC2 with Wi-Fi connected.
Summary
- 1 × RISC-V core at 160 MHz, 400 KB SRAM, Wi-Fi 4 + BLE 5.
- Native USB Serial/JTAG and good deep sleep current.
- 22 GPIOs, no DAC and no touch.
- It is the best starter buy in 2026: cheap, modern and well supported.
- If you need more muscle or pins, jump to the S3 or S2.
Next step: the ESP32-C6, with Wi-Fi 6 and a radio for Matter. Or go back to the series hub.