The ESP32 is probably the most popular Wi-Fi + Bluetooth microcontroller in the maker world. It costs less than a coffee, is roughly 20× more powerful than an Arduino UNO, and comes in a dozen flavours: ESP32, S2, S3, C3, C6, H2, P4… Picking the wrong variant is the number one beginner mistake.
This guide is the one I wish I had read at the start: what it exactly is, how each family member differs, how to read a pinout without getting it wrong, which one to buy for your project, and where to get it.
The ESP32 in 30 seconds
An ESP32 is a chip (SoC) that includes:
- A 32-bit processor (1 or 2 cores, Xtensa or RISC-V).
- Wi-Fi and, depending on the variant, classic Bluetooth, BLE and/or Zigbee/Thread.
- SRAM and, on some models, external PSRAM.
- Plenty of peripherals: GPIO, ADC, DAC, PWM, I2C, SPI, UART, I2S, CAN…
- All for $2–5 on a board that plugs straight into USB.
That mix of power, radio and price is what made it the de-facto standard for home IoT.
SoC, module and board are not the same thing
A detail that confuses many people:
| Term | What it is | Example |
|---|---|---|
| SoC | The bare chip | ESP32-D0WDQ6 |
| Module | SoC + flash + antenna + shielding | ESP32-WROOM-32 |
| Board / devkit | Module + USB + regulator + buttons | ESP32-DevKitC-32E |
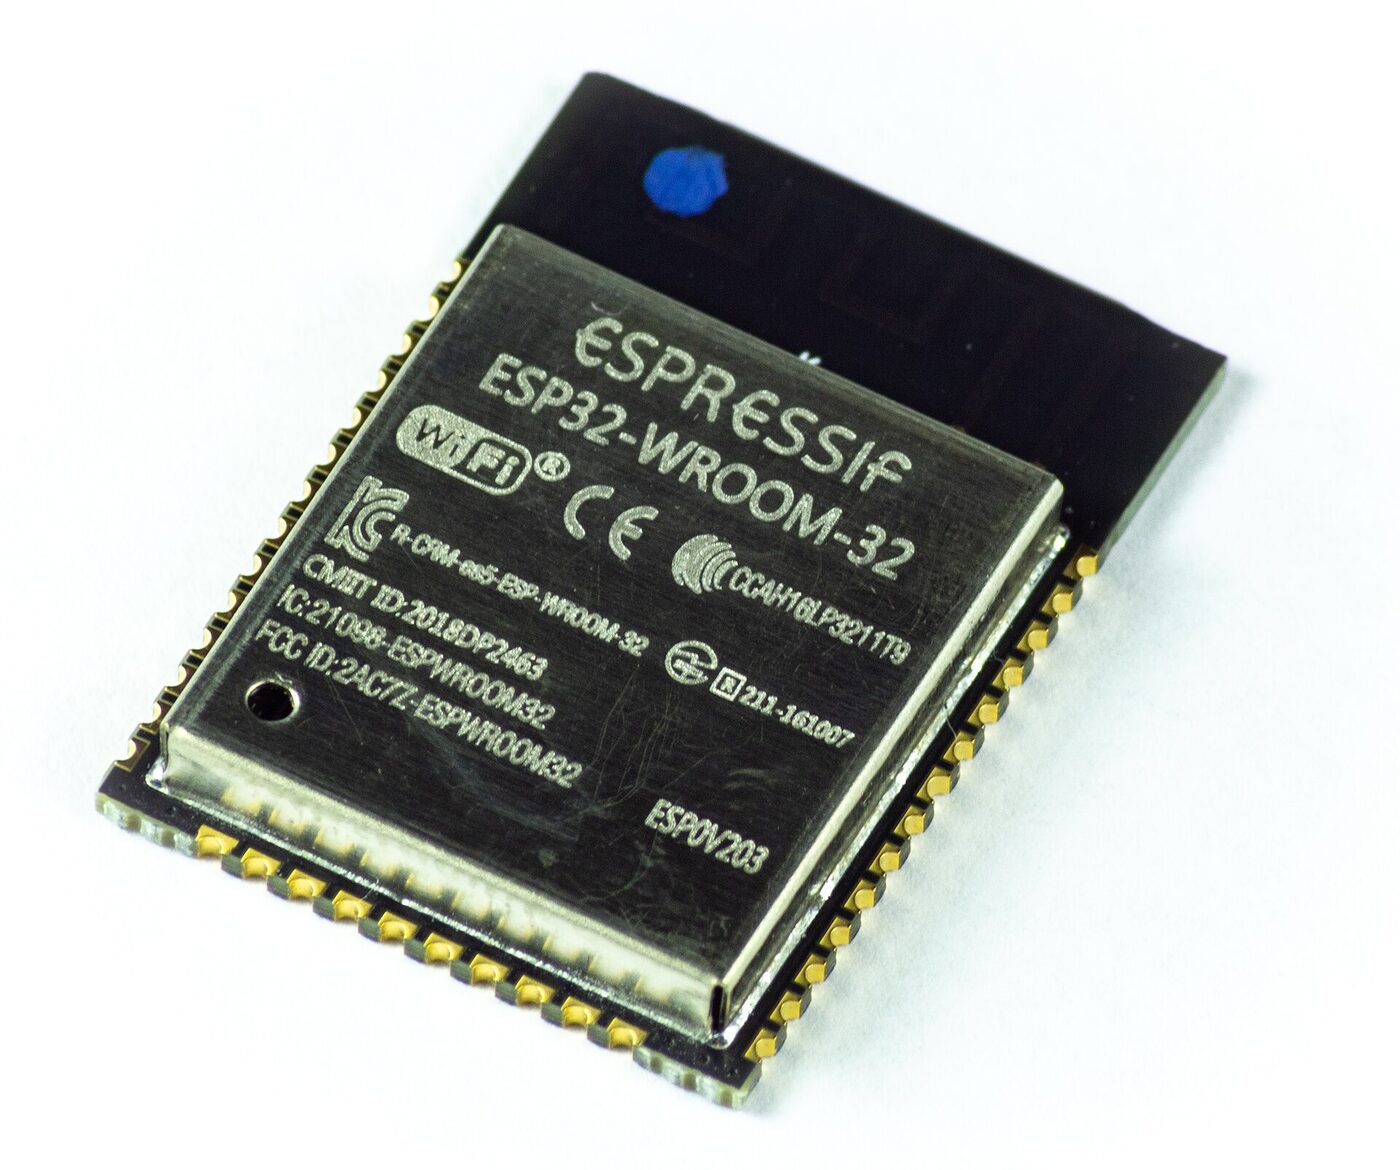
When you buy on AliExpress or Mercado Libre you almost always get a devkit (the full board). When you design your own PCB, you buy the module.
The ESP32 family
All relevant members, in chronological order:
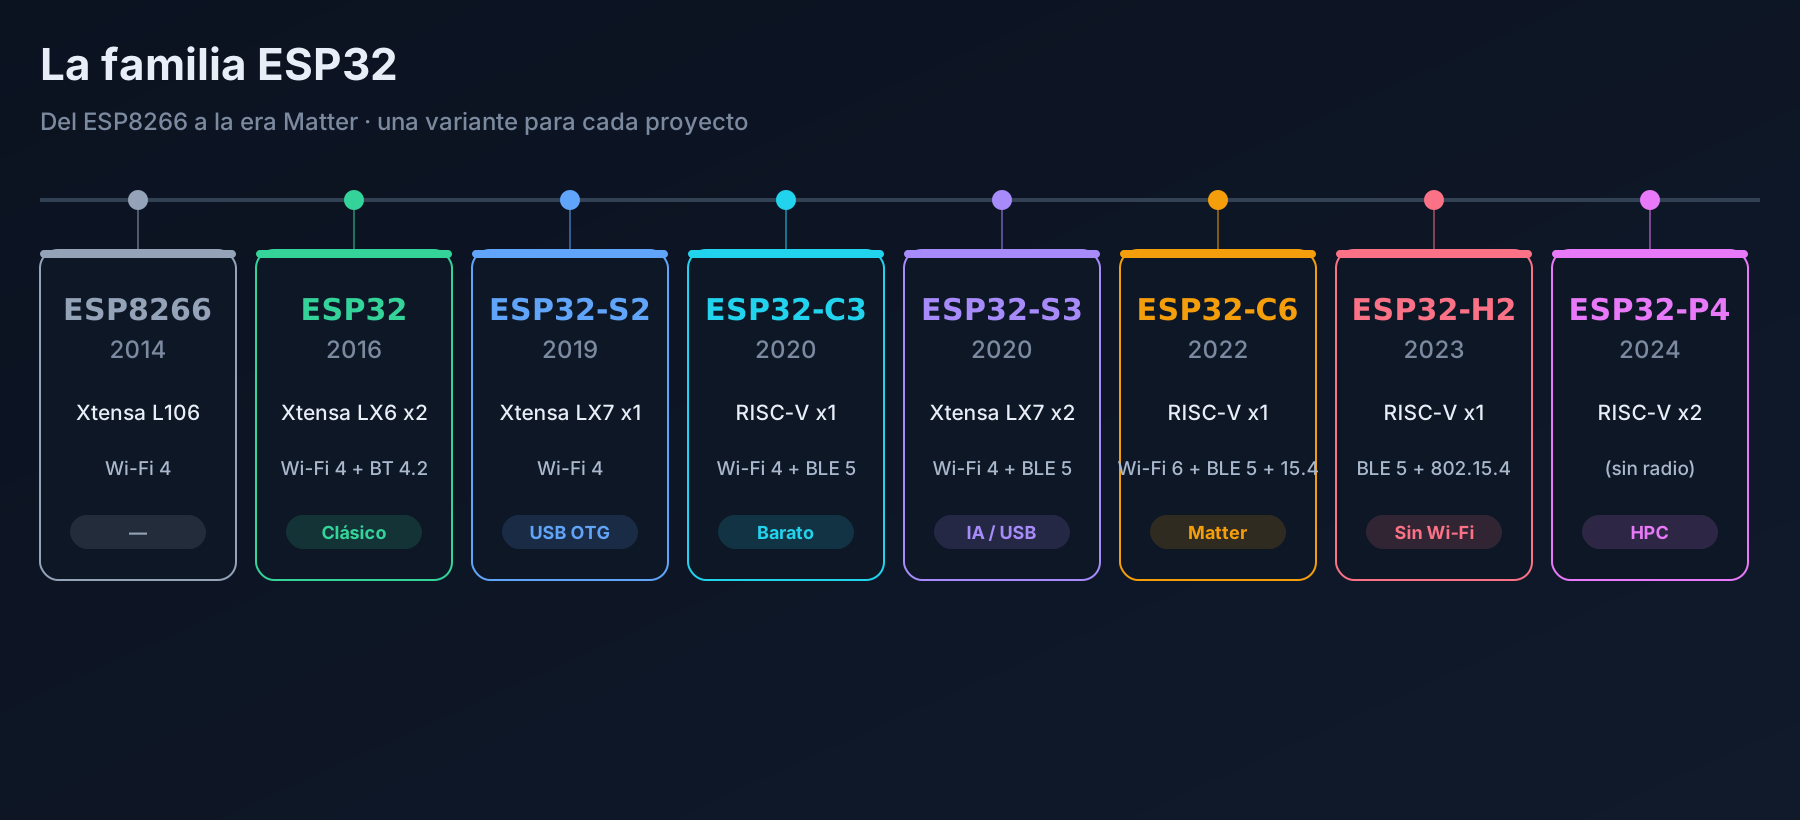
And the table that actually matters when buying:
| Variant | Year | Core | Radio | GPIOs | Native USB | Best for |
|---|---|---|---|---|---|---|
| ESP8266 | 2014 | Xtensa L106 ×1 @ 160 MHz | Wi-Fi 4 | ~11 usable | ❌ | Cheapest Wi-Fi projects |
| ESP32 (classic) | 2016 | Xtensa LX6 ×2 @ 240 MHz | Wi-Fi 4 + BT 4.2 | ~34 (25 usable) | ❌ | General purpose, cheapest |
| ESP32-S2 | 2019 | Xtensa LX7 ×1 @ 240 MHz | Wi-Fi 4 | ~43 | ✅ | USB, HID, lots of pins |
| ESP32-C3 | 2020 | RISC-V ×1 @ 160 MHz | Wi-Fi 4 + BLE 5 | ~22 | ✅ | Modern, inexpensive replacement |
| ESP32-S3 | 2020 | Xtensa LX7 ×2 @ 240 MHz | Wi-Fi 4 + BLE 5 | ~45 | ✅ | AI, camera, audio, USB |
| ESP32-C6 | 2022 | RISC-V ×1 @ 160 MHz (+ LP core) | Wi-Fi 6 + BLE 5 + 802.15.4 | ~30 | ✅ | Matter, Thread, Zigbee |
| ESP32-H2 | 2023 | RISC-V ×1 @ 96 MHz | BLE 5 + 802.15.4 | ~26 | ✅ | Matter/Zigbee nodes without Wi-Fi |
| ESP32-P4 | 2024 | RISC-V ×2 @ 400 MHz | no radio | many | ✅ | HMI, displays, high performance |
Quick rule: not sure? Buy an ESP32-C3 if you want something cheap and modern, or an ESP32-S3 if you need power, camera or USB.
Variant by variant
ESP8266 — the grandfather that still works
It is not an ESP32, but it is its predecessor and still sells for under $2. It has one core, no Bluetooth and few GPIOs — yet it is enough for a temperature sensor publishing over Wi-Fi.
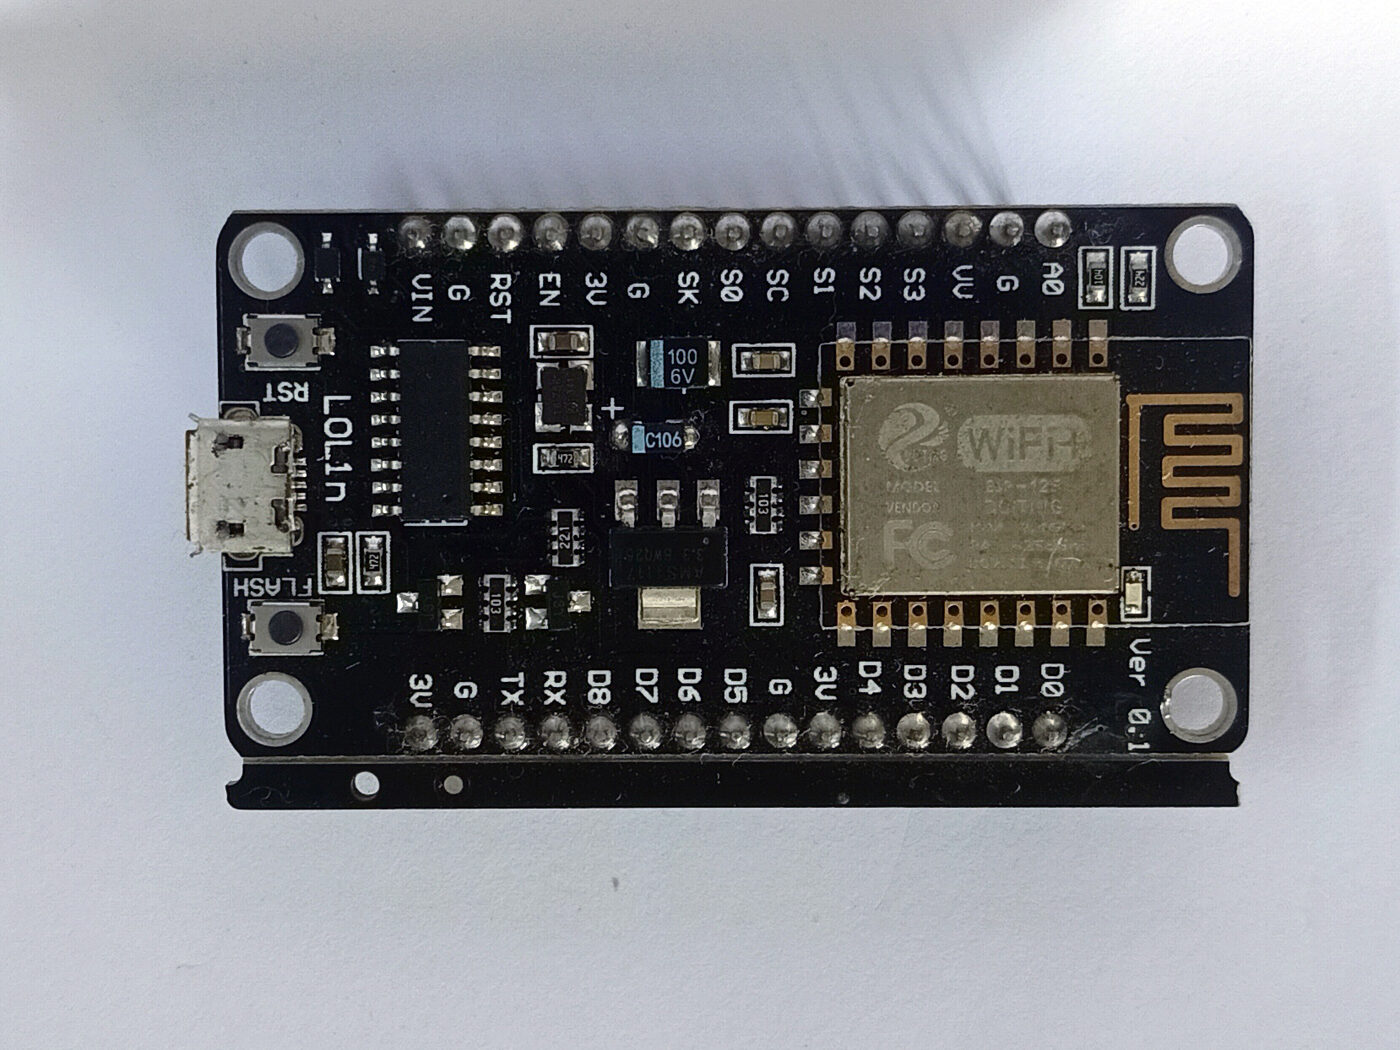
Only consider it if price is the only thing that matters. For a little more you get a C3, which is better at everything.
Classic ESP32 — the all-rounder
The 2016 one. Two cores at 240 MHz, more GPIOs than almost any other, and the only variant with classic Bluetooth (plus BLE). It is the chip in most old tutorials and still a perfect choice to start.
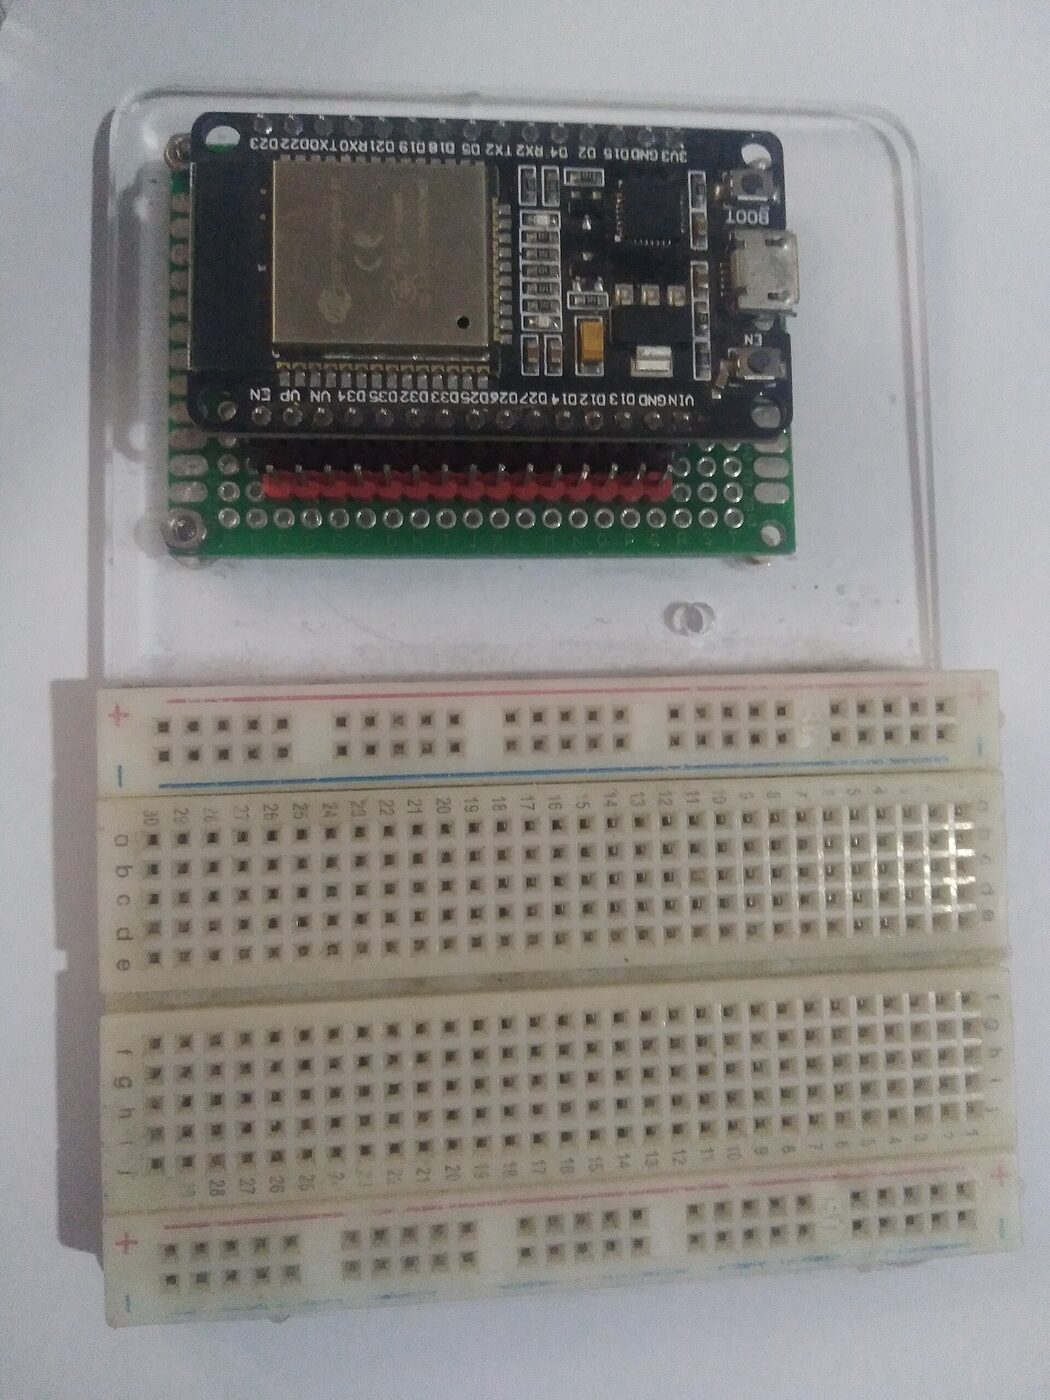
Downsides: no native USB (it uses a CH340 or CP2102 serial chip) and higher sleep current than modern variants.
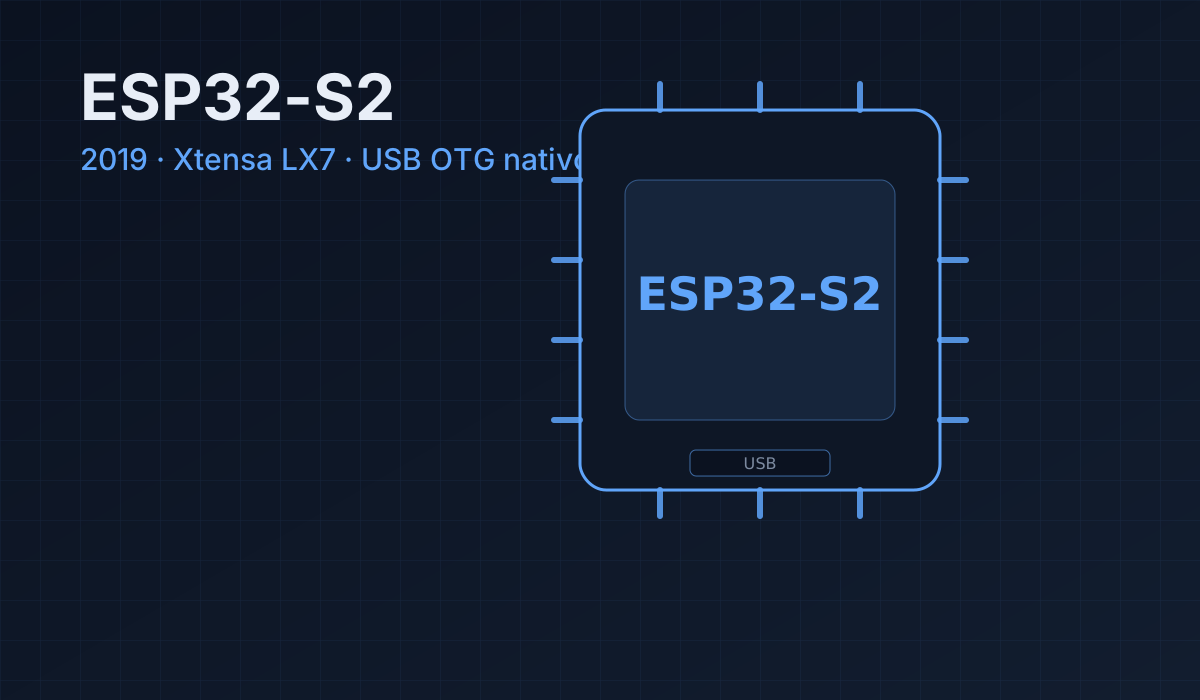
ESP32-S2 — the one without Bluetooth
The S2 was the first ESP32 with native USB OTG and lots of GPIOs (~43). Its sin: no Bluetooth. If you do not need it, it is a great option for HID (keyboards, mice) or pin-hungry projects.
ESP32-S3 — the powerful one
The favourite for ambitious projects: two LX7 cores, BLE 5, native USB and, above all, vector instructions that speed up AI workloads (voice, vision). It is what camera boards and display boards use.
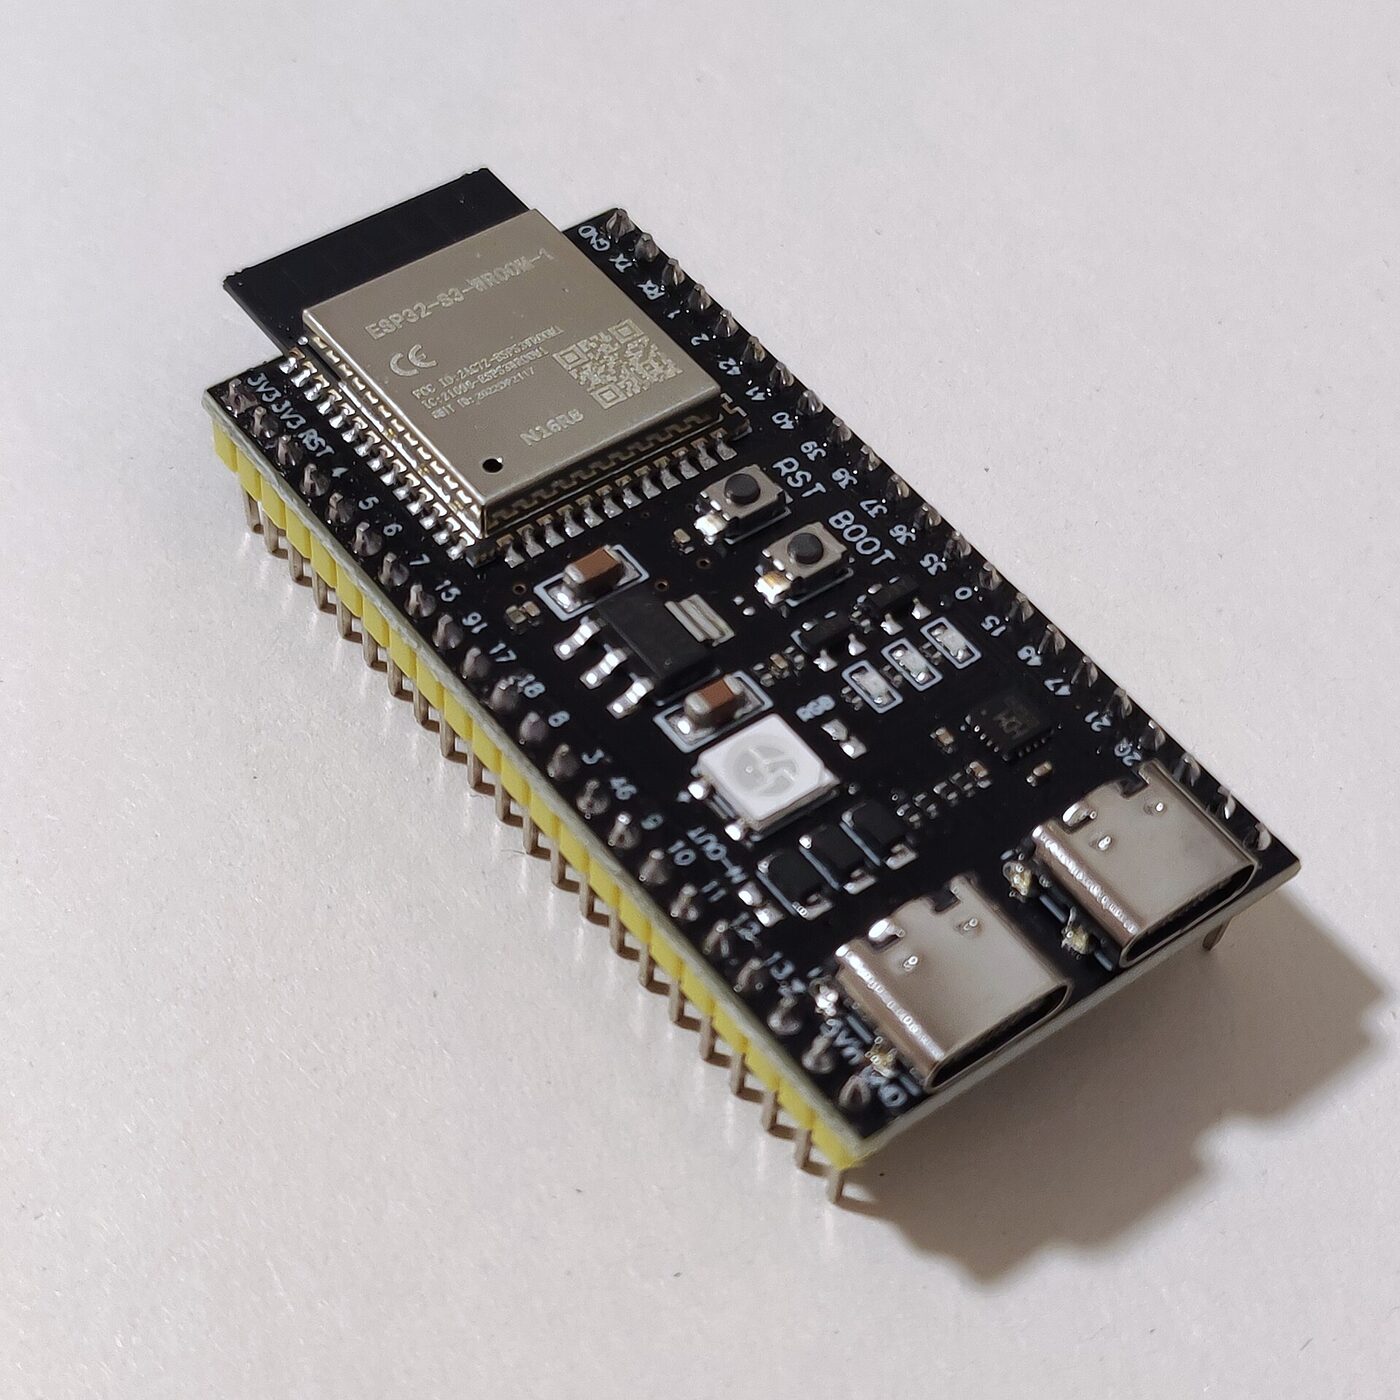
Downsides: pricier than a C3, and overkill if you are not using camera/AI.
ESP32-C3 — the balanced one
My default recommendation in 2026. It is RISC-V, with BLE 5, native USB Serial/JTAG and an ESP8266-like price. For sensors, relays, home automation and almost any normal project, it is more than enough.
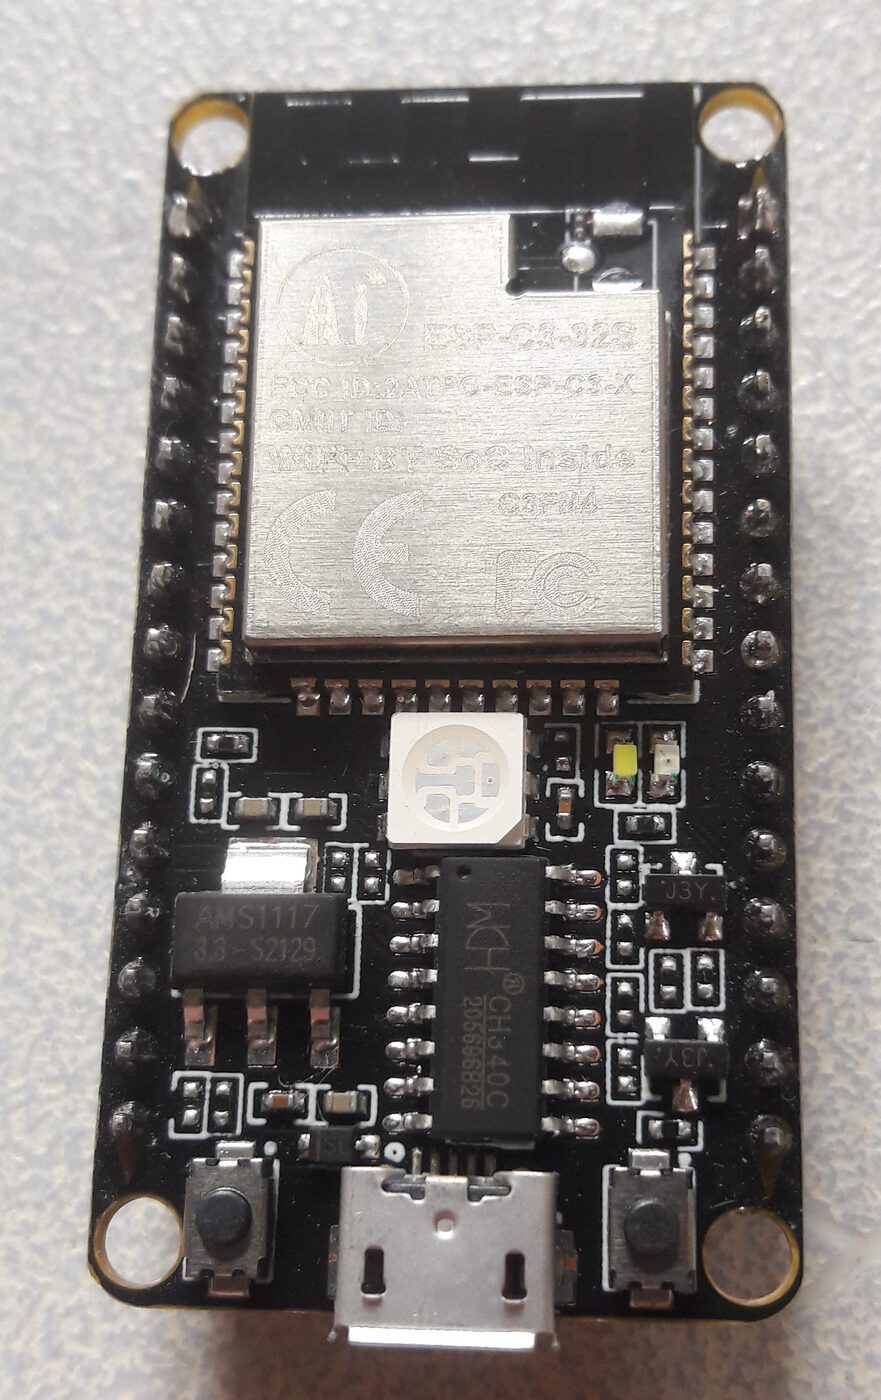
Downsides: fewer GPIOs (~22) and no classic Bluetooth (BLE only).
ESP32-C6 — the Matter one
The first ESP32 with Wi-Fi 6 and, more importantly, an 802.15.4 radio: that means Thread, Zigbee and Matter. If you want modern, compatible home automation, this is the chip.
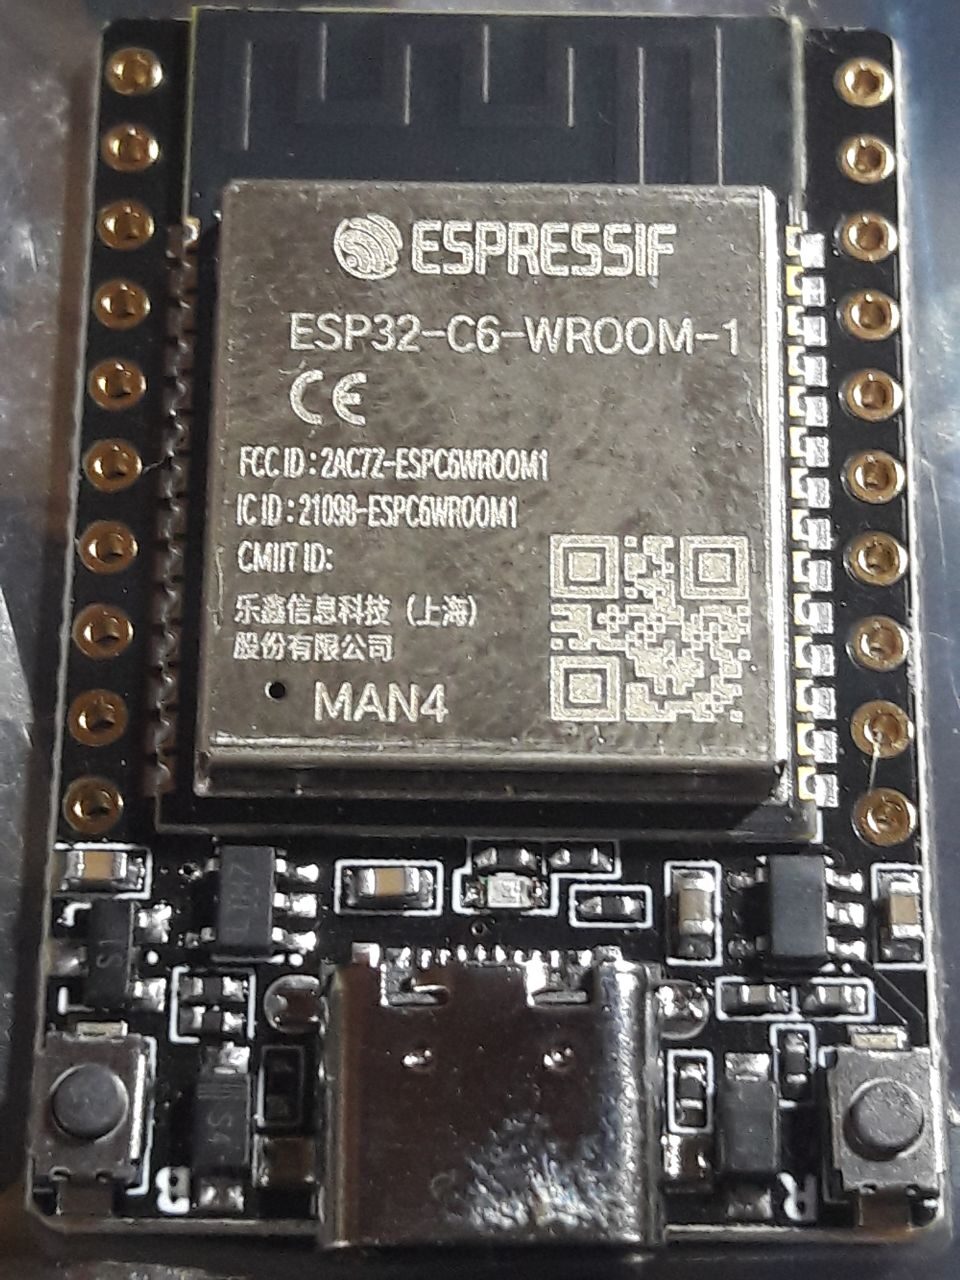
Downsides: it needs a recent toolchain (ESP-IDF 5.1+) and some modules are still hard to find locally.
ESP32-H2 — the one without Wi-Fi
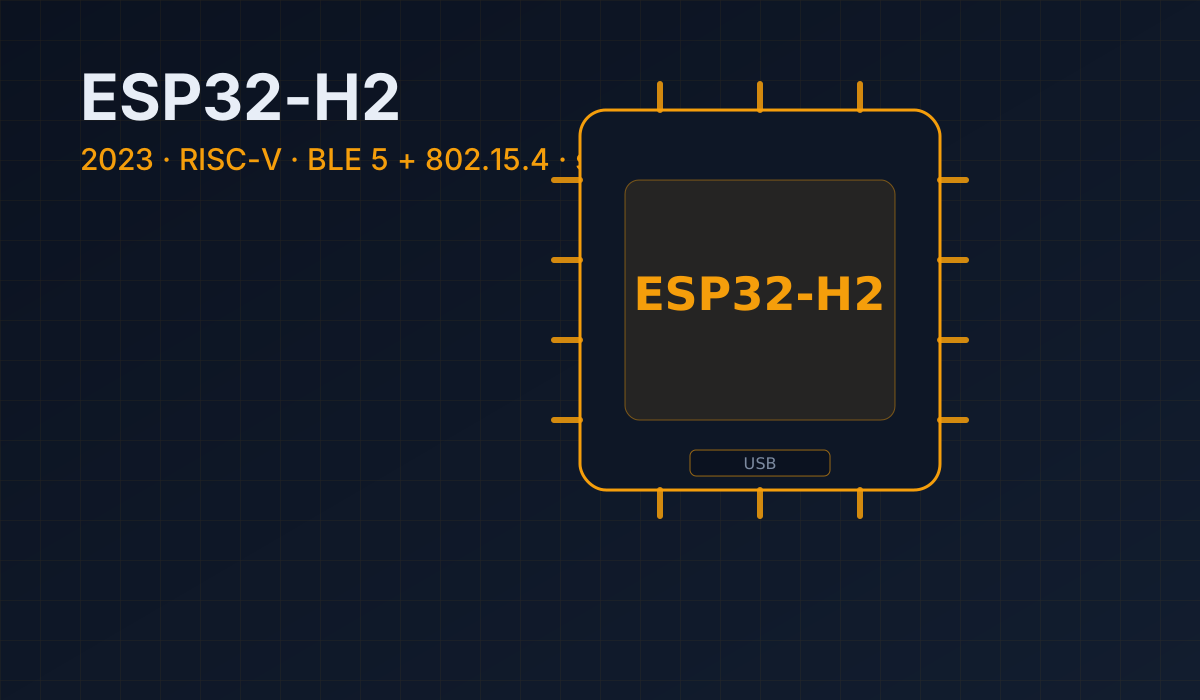
Like the C6 but without Wi-Fi: only BLE and 802.15.4. It sounds odd, but for a battery-powered Matter node it is perfect (less radio, less power).
ESP32-P4 — the new one (no radio)
The P4 (2024) is different: no Wi-Fi or Bluetooth, but two 400 MHz cores and support for high-end displays/cameras. It is used as an application host, usually paired with a C6 for connectivity.
How do I know which board I have?
Look for the name printed on the metal module:
ESP-WROOM-32orESP32-WROOM-32→ classic ESP32.ESP32-WROVER→ classic with PSRAM (more memory, great for cameras).ESP32-S3-WROOM-1→ S3.ESP32-C3-MINI-1orESP32-C3-WROOM-02→ C3.ESP32-C6-WROOM-1→ C6.ESP32-S2-…→ S2.ESP32-H2-…→ H2.
If you see nothing, look at the pin pattern: the classic’s GPIO34–39 are input-only, which is unmistakable once you probe a sensor.
Pinouts (the pin maps)
A pinout is the map that tells you what each pin does. Not all pins are equal: some are input-only, some set the boot mode and some are off-limits.
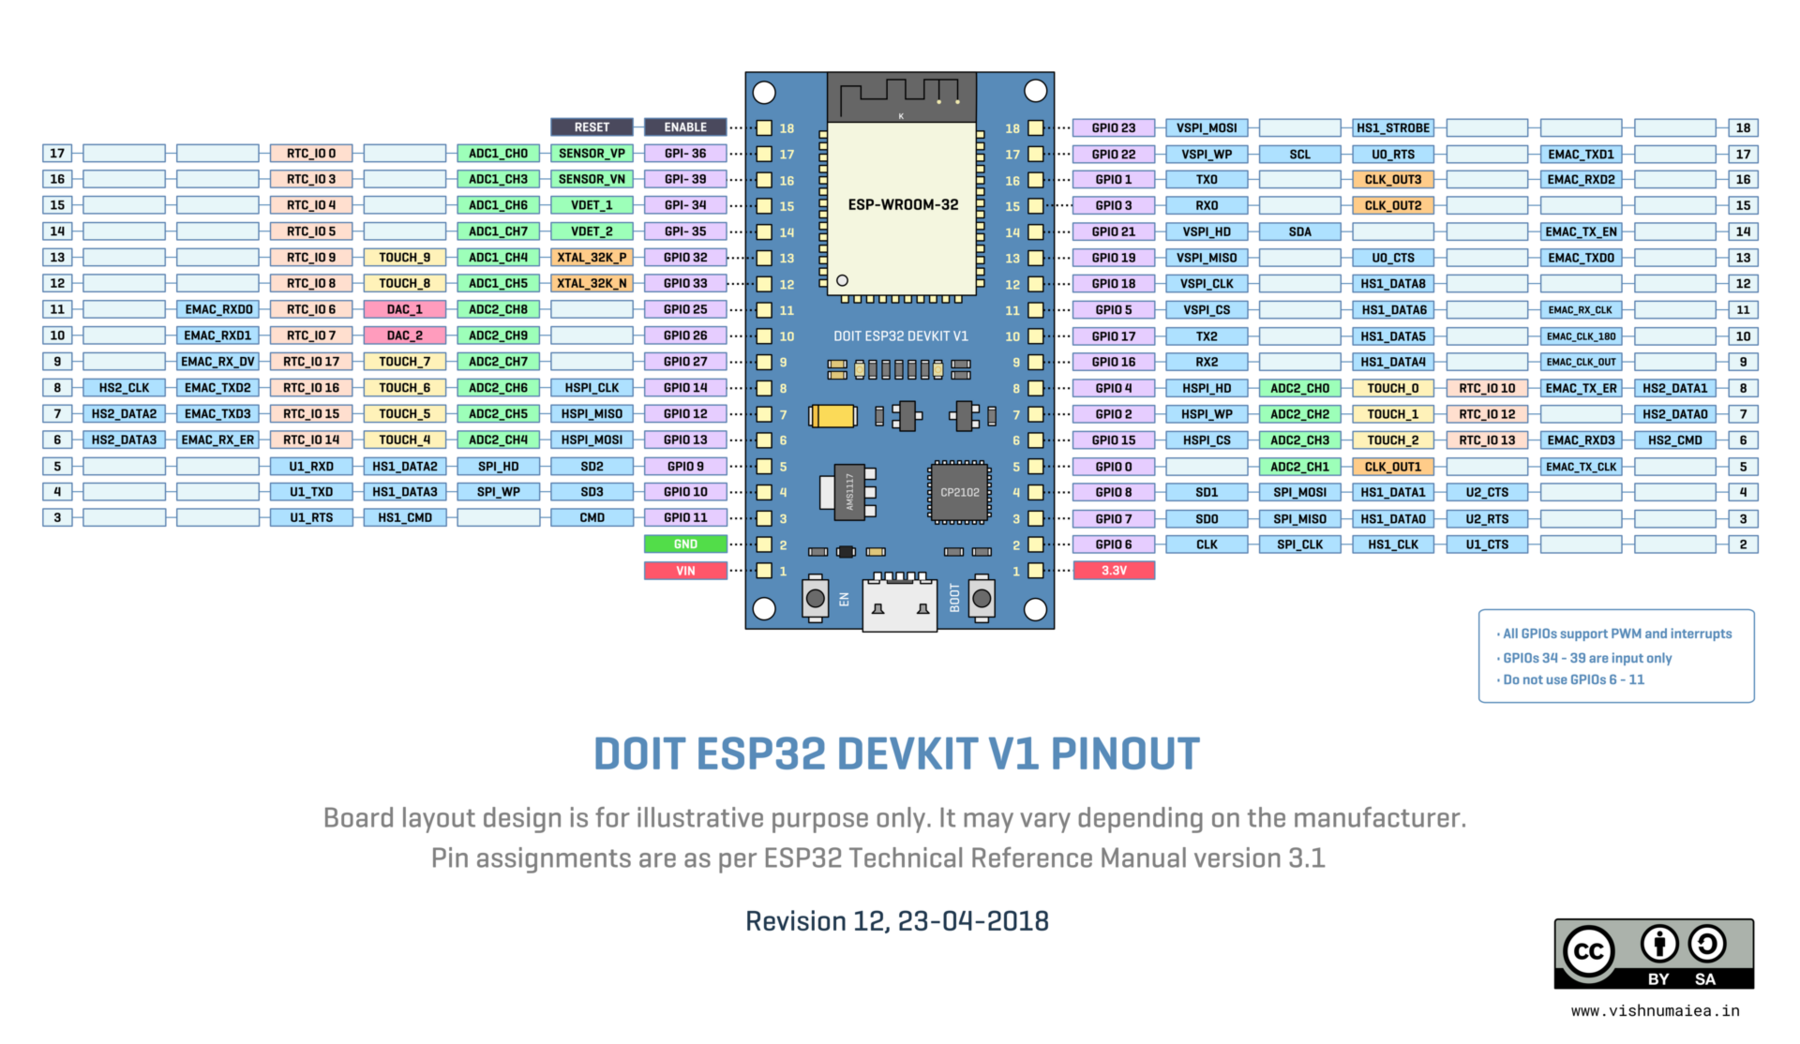
Guidelines worth gold on the classic ESP32:
- GPIO6–11: wired to the flash. Never use them.
- GPIO34–39: input only, no internal pull-up.
- GPIO0, 2, 12, 15: they affect the boot mode. Avoid them as outputs.
- GPIO1 (TX0) and GPIO3 (RX0): the serial port. Use with care.
- ADC2 does not work while Wi-Fi is active: use ADC1 (GPIO32–39).
And the C3 pinout, increasingly common:
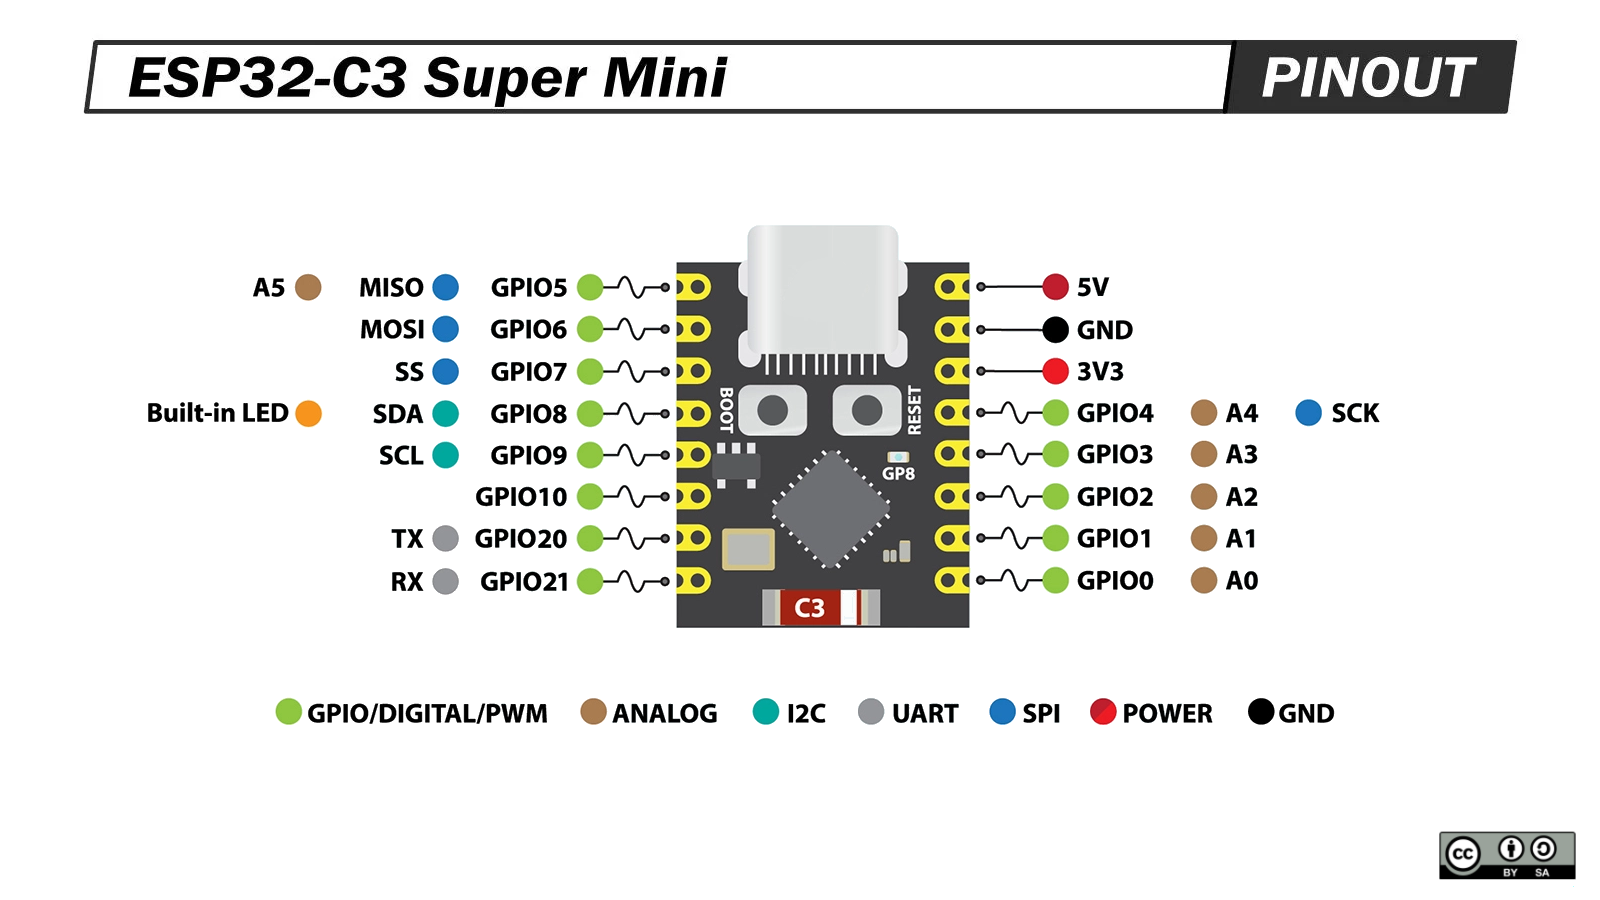
Official, always up-to-date pinouts live at docs.espressif.com. When in doubt, that is the source of truth.
Which one should I buy? (by project)
| I want… | Buy |
|---|---|
| To start and learn | ESP32-C3 or classic ESP32 |
| Home Assistant automation | ESP32-C3 or, for Matter, C6 |
| Camera, audio or AI | ESP32-S3 (+ PSRAM) |
| A battery Matter/Zigbee node | ESP32-C6 or H2 |
| Lots of pins or USB HID | ESP32-S2 |
| The cheapest sensor node | ESP8266 or ESP32-C3 |
| A big display / HMI | ESP32-P4 + C6 |
For your first board, buy two: a cheap C3 to tinker with and an S3 with PSRAM if you are thinking about cameras or displays. That way you will not run short.
Where to buy
Here is the part almost no Spanish-language tutorial covers well. Prices and shipping vary a lot by store and country, so treat this as a guide to where to look and what to watch out for, not a fixed ranking.
🇲🇽 Mexico
- Mercado Libre — the most practical: domestic shipping, local payment and competitive prices. Watch the sellers: check reputation and make sure the photos are of the real product (not a generic render).
- Amazon Mexico — fast shipping (Prime) and easy returns; usually a bit more expensive than Mercado Libre.
- UNIT Electronics — Mexican electronics/development store. Good for buying loose modules, sensors and accessories in the same order, though board stock varies.
- Local robotics/maker shops — many cities have one (CDMX, Guadalajara, Monterrey); worth it if you need the part today.
🌎 International
- AliExpress — by far the cheapest. Downside: slow shipping (2–6 weeks) and variable quality. Great for ordering several boards and sensors at once.
- LCSC — genuine components and modules at good prices; useful for volume or PCB design.
- Adafruit / SparkFun — their own boards, great quality and excellent docs. Expensive to ship to Latin America, but the standard for serious prototypes.
- Mouser / Digi-Key / Farnell — authorized distributors: guaranteed original chips and datasheets. They ship to Mexico, with cost and paperwork.
- Espressif (official store) — original modules; useful if you manufacture.
How to avoid bad clones
- Ask about the USB-serial chip. CH340 works, but some drivers are painful on macOS. CP2102 usually gives less trouble.
- 30 vs 38 pins. Many cheap classic boards only break out 30 pins: you lose GPIOs. If you can, pick the 38-pin one.
- USB-C vs micro-USB. Micro-USB in 2026 is a pain; pay a little more for C.
- Real PSRAM. If you buy an S3 for camera work, make sure it lists PSRAM (8 MB on the good ones).
- Antenna. Boards with a U.FL/IPEX connector allow an external antenna if the ESP32 will live inside a metal enclosure.
- BOOT and EN buttons. Make sure they exist: without
BOOTyou sometimes cannot flash.
Common beginner mistakes
- Buying a board without native USB thinking the serial port is native.
- Choosing the ESP8266 “because it is cheaper” when the C3 costs about the same and is better.
- Buying an S3 without PSRAM for a camera project.
- Forgetting that on the classic the GPIO34–39 are input only.
- Trying to use ADC2 with Wi-Fi on.
Summary
- The ESP32 is a SoC with radio, plenty of power and a ridiculous price.
- The family is broad: ESP8266 → ESP32 → S2 → C3 → S3 → C6 → H2 → P4.
- To start: C3 (cheap) or S3 (powerful). For modern automation: C6.
- The pinout is not optional: there are forbidden pins and input-only pins.
- Buy where you can return, and distrust boards that are “too cheap”.
Next step: pick your board and set up the toolchain. The next chapters of the
ESP32 first steps series will appear on the blog; in the
meantime, browse by topic or hit Ctrl + K to search.
Image credits
All photographs come from Wikimedia Commons and are used under their license (CC0 or CC BY-SA 4.0), with attribution:
- ESP32-WROOM-32 module — Ubahnverleih (CC0)
- ESP32-DevKitC — Edwiyanto (CC BY-SA 4.0)
- ESP32-S3 — VectorVoyager (CC BY-SA 4.0)
- ESP32-C3 — Popolon (CC BY-SA 4.0)
- ESP32-C6 — Popolon (CC BY-SA 4.0)
- ESP32-CAM — Nowforever (CC BY-SA 4.0)
- ESP8266 — Suyash Dwivedi (CC BY-SA 4.0)
- ESP32 DevKitC pinout — Vishnu Maiea (CC BY-SA 4.0)
- ESP32-C3 pinout — Srdocdoc (CC BY-SA 4.0)
ESP32-S2, ESP32-H2 and family illustrations are our own.